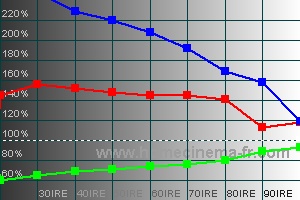
So the fancy mounting of the sensor to my tripod ended up being some painters green tape.. I set the spyder sensor without the LCD filter attached facing the screen (to capture reflected light from the screen) a few inches away from the center – and at a slight angle to avoid the shadow of the sensor itself. A quick run with AVIA to get IRE10 – IRE100 and I was able to capture some interesting data.

While I didn’t let the CRT run for more than about 10 minutes, things clearly need improving. I tested the uncalibrated screen of my laptop with the sypder sensor and it read fairly flat (if you ignored the low IRE numbers) – as I would have expected – so I have some level of confidence in the software actually trying to do something sensible.
Of course – now I need to learn how to properly interpret the data, and what steps to take in order to make sensible improvements. The absolute first thing I should do is a full setup (mechanical, etc) of the basics. Its been a long time since I’ve taken the time to properly calibrate the system doing the things that I know how to do.
I did come across a useful article on Curt Palme’s site. How to set G2 on ES focus sets. This isn’t how I’ve done it in the past – having simply blanked the tube (to give a completely black image) and then set the G2 such that the raster just disappeared. Having just searched this blog for g2, it seems I haven’t taken the time to really sit down and document a full setup procedure – and I should as it would serve as a good reference for myself later on.